A few articles ago, we looked at why Google Tag Manager is a Brokers friend. The use case mentioned in the article tracked form conversion of a customer inquiry on a web page. Form submissions in real estate capture leads, so it is imperative to integrate forms into Google Analytics and learn as much as possible from our customers. This is one area where Google Tag Manager (GTM) and Google Analytics (GA) work beautifully together.
This article is a step-by-step instruction on how to setup a Tag in Google Tag Manager to capture a button click on an inquiry form and send it to Google Analytics as an Event. Once the Event is captured in GA, create a GA Goal Conversion to gain a plethora of insights. These insights can include:
- The amount of traffic it takes to capture a lead.
- Which channels deliver or don’t deliver the most leads?
- How effective is your marketing campaign in generating leads?
- Which demographic, location, and interests give the best lead generation?
- Compare how converters interact differently with the web site.
Step 1: Setting up Google Tag Manager
First time access to GTM needs Account setup to manage your tags.
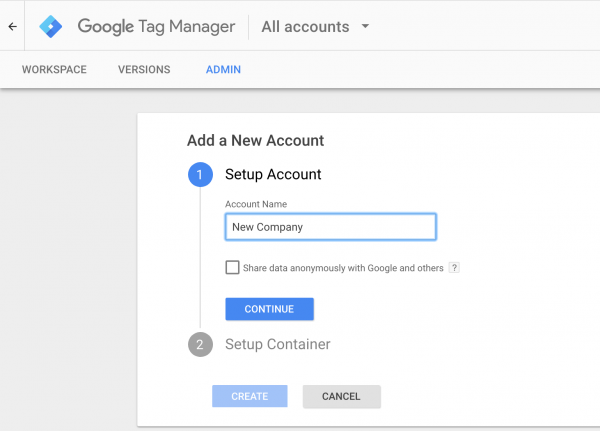
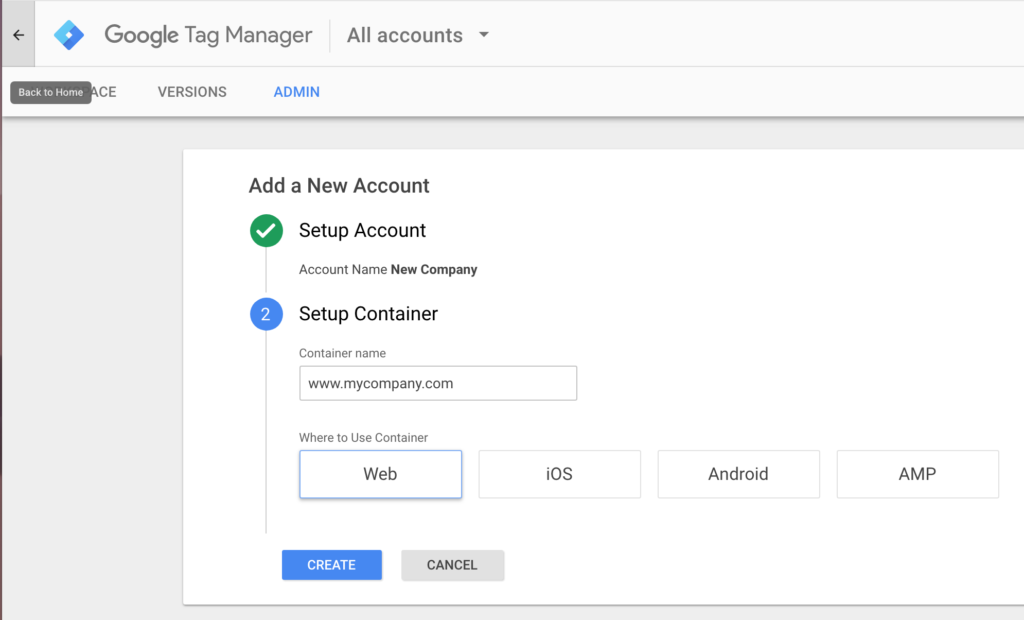
Enter the name of the company web site and select the “Web” as the container type. Containers store the different tags for each Internet asset, such as a web site, mobile app, or Google’s AMP.
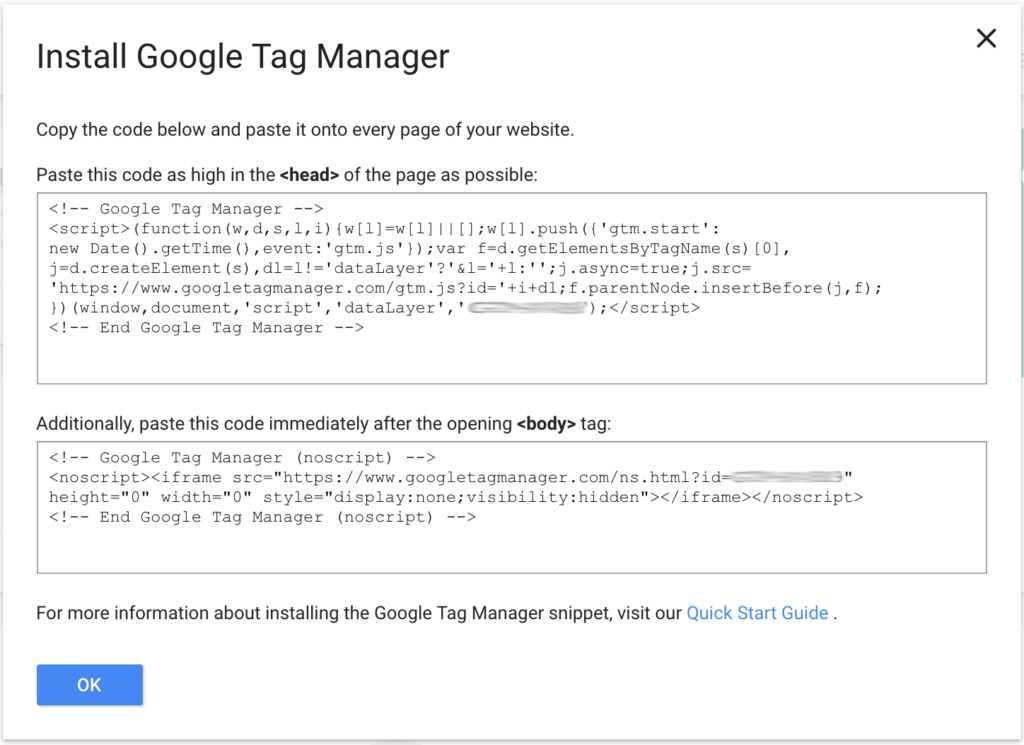
GTM displays the code snippet for your IT or webmaster to install onto the web site. If you are using the GTM for WordPress plugin, all you need is the ID (blurred out in the below image). This is the only time that IT interaction is required. Once completed, the marketing team can safely and securely use GTM to add their own code snippets to support future initiatives.
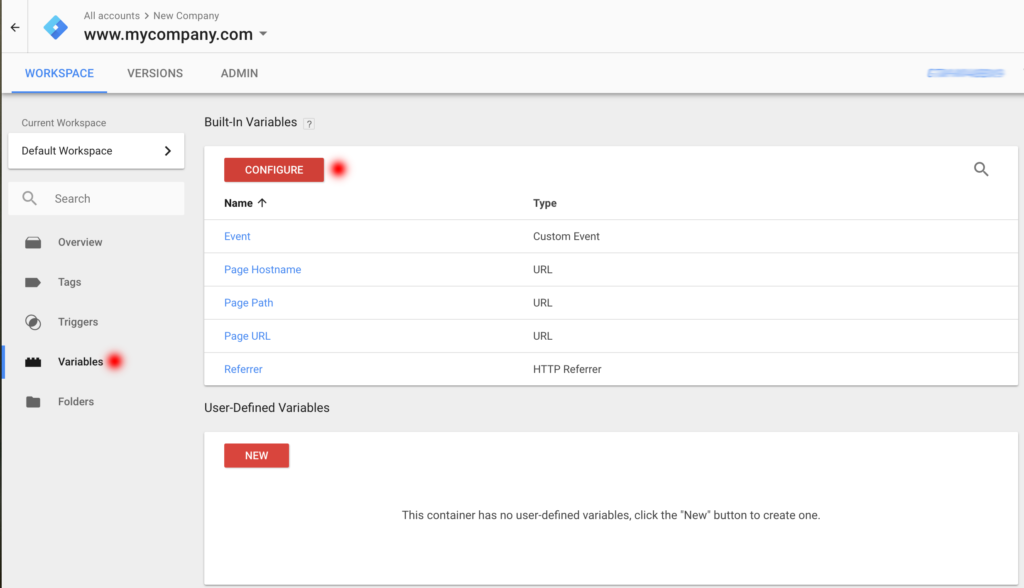
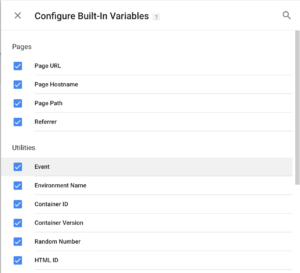
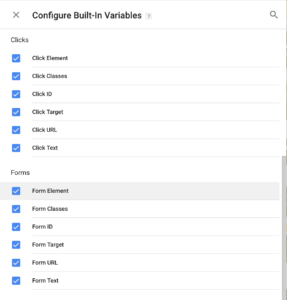
Step 2: Enable the Built-in Variables for your Account
Select “Variables” from the left-hand sidebar and the “Configure” button in the Built-in Variables container.
Configure Built-in Variables slider displays to select variables to use as a trigger. Select all the Pages, Utilities, Clicks and Forms variables into the account.
Step 3: Setup a Trigger to Listen for the Forms Submit Button.
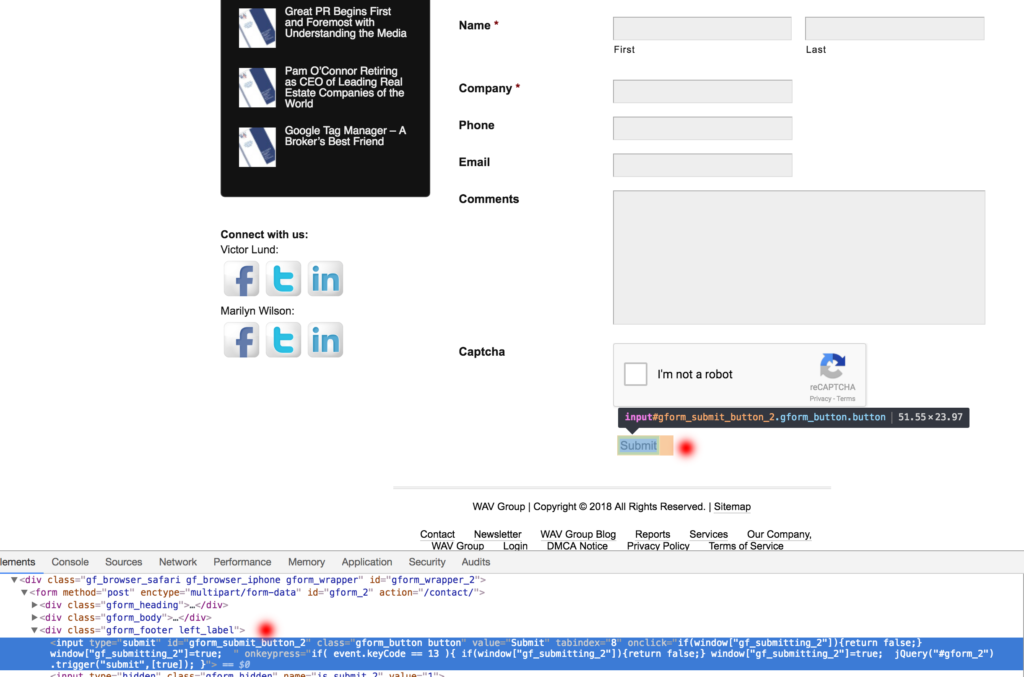
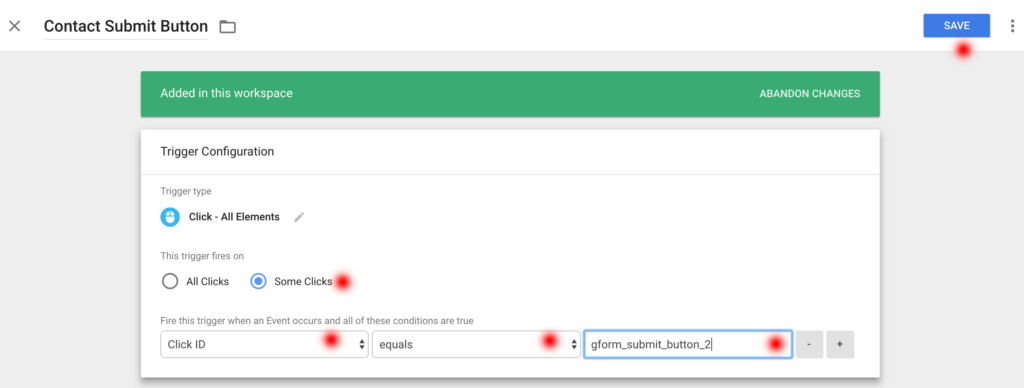
Our goal is to create a trigger when a customer has completed an inquiry form and has clicked on the ‘Submit’ button. Using the web inspector tool in Chrome or Firefox, find the html input code for the “Submit” button. The id for the button below is gform_submit_button_2 and will be used to fire the trigger set in the Click ID enabled in the Built-in Variables.
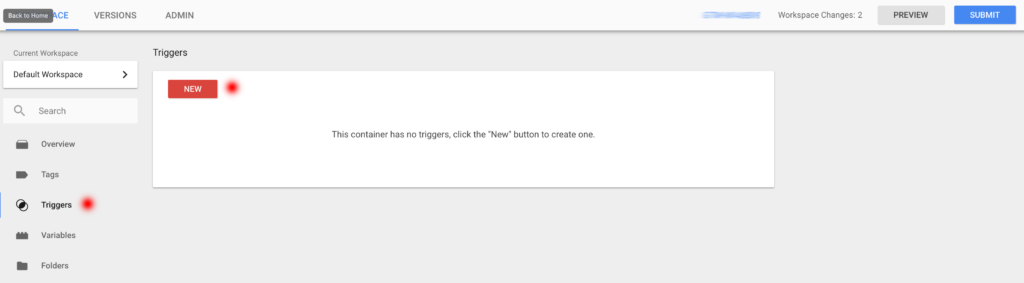
With the submit id from our button, create a new Trigger in GTM.
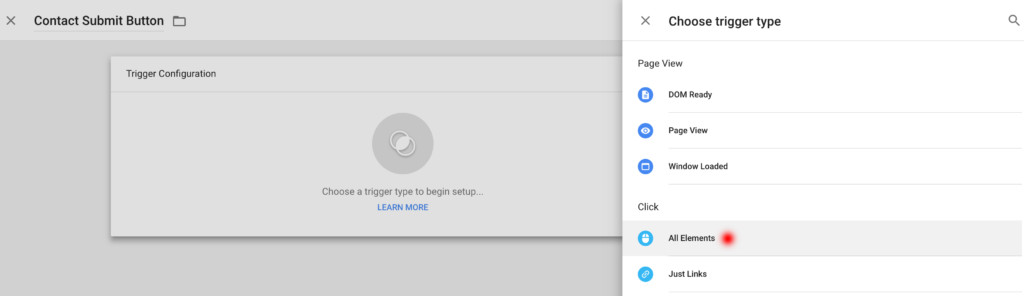
Create a name for the Trigger and click within the Trigger Configuration container to select a trigger type. Since we want to capture the click event on the page, find “Click” and select the “All Elements” trigger type.
Setup what the trigger should listen for on a click event. Because the goal is to only capture a single click of a button, set the trigger to only fire on Some Clicks. Set the criteria of the click of the trigger so the ‘Click ID’ equals ‘gform_submit_button_2’.
Step 4: Creating the GTM Tag to Send an Event to Google Analytics
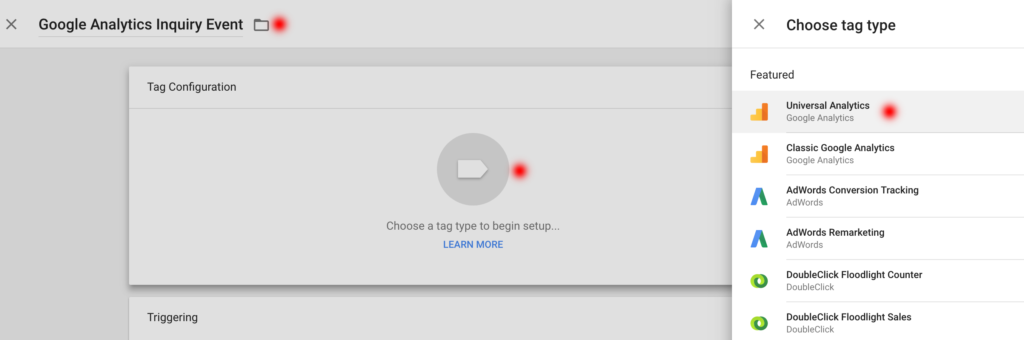
Select “Tags” from the left-hand sidebar and give your tag a name and click within the Tag Configuration container. Notice there are several choices of tag types. Select Universal Analytics for GA for this exercise.
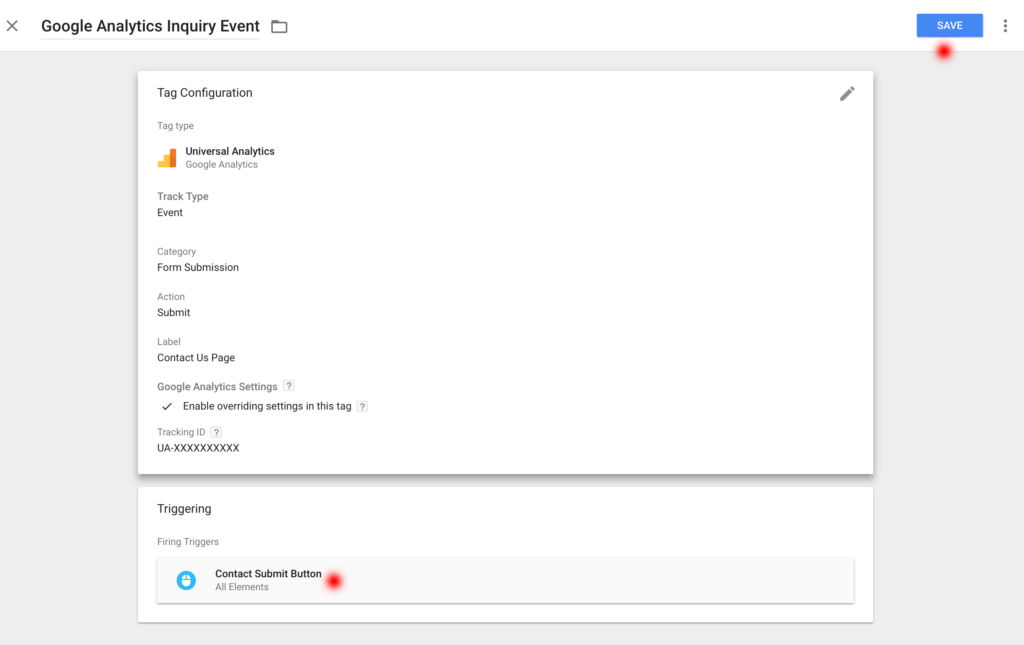
GA tag has plenty of options, but for this exercise, select the Event track type. Events have several required and optional parameters to set depending on your needs on how to view them in Google Analytics.
Category (required) – An object that was interacted with on the page.
Action (required) – A type of customer interaction on the page.
Label (optional) – Usually used to further categorize the action.
Value (optional) – Some value placed to completion of the action.
Select the “Enable overriding settings in this tag” option to display the Tracking ID field. Enter the Google Analytics Tracking ID code.

A notification will display to create a Trigger for this Tag. Select the Trigger created earlier in this post which is, Contact Submit Button. “Save” the Tag.
Now that the Tag is complete, select “Submit” and “Publish” your GTM Tag Manager.

Step 5: Test, Test, Test
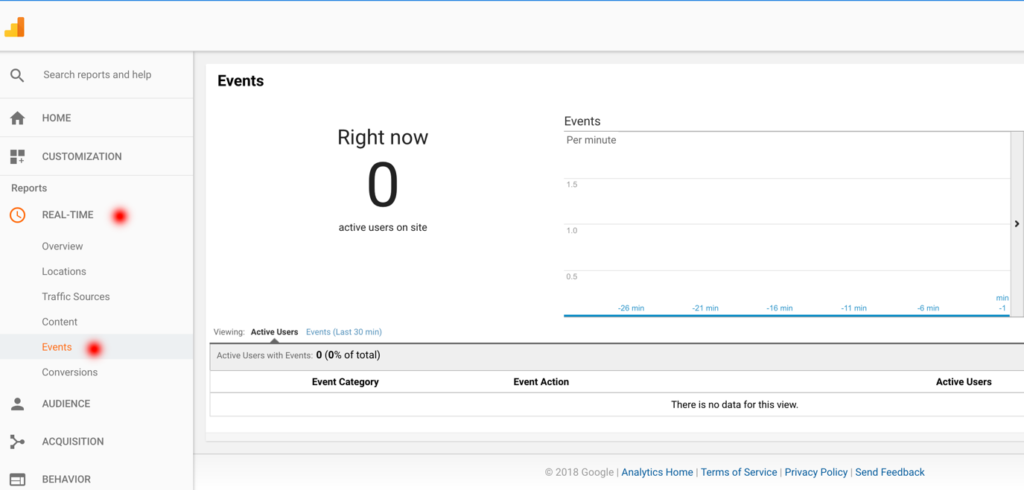
There is an easy way to test to see if your tag and trigger setup is working by using Google Analytics Real-Time reporting. Access the Google Analytics account for the web site and select the Events under the Real-Time reports. Complete the form on the web site and submit an inquiry. If all works well, you will see an Event by a user in the Real-Time report.
Imagine what you can do!
The power of Google Tag Manager and Google Analytics gives brokerages the ability to create custom metrics to measure performance. Advantages such as building funnel visualizations to understand the user behavior to goal conversion, figure out how many consumers see the form and pass over it to access other information, and what information is more engaging to consumers.
With this type of information, Zillow and Realtor.com are using these tools to adjust their web sites and mobile applications to better fit the consumer experience. This is where the WAV Group can help. Let’s build strategies using Google Tag Manager and Google Analytics to provide actual results of how your consumers are interacting with your digital assets.


I find your blog very informative. it help me a lot thanks subscribed to your blog..